Active Fire Time: 2 minutes Total Time: 20 minutes
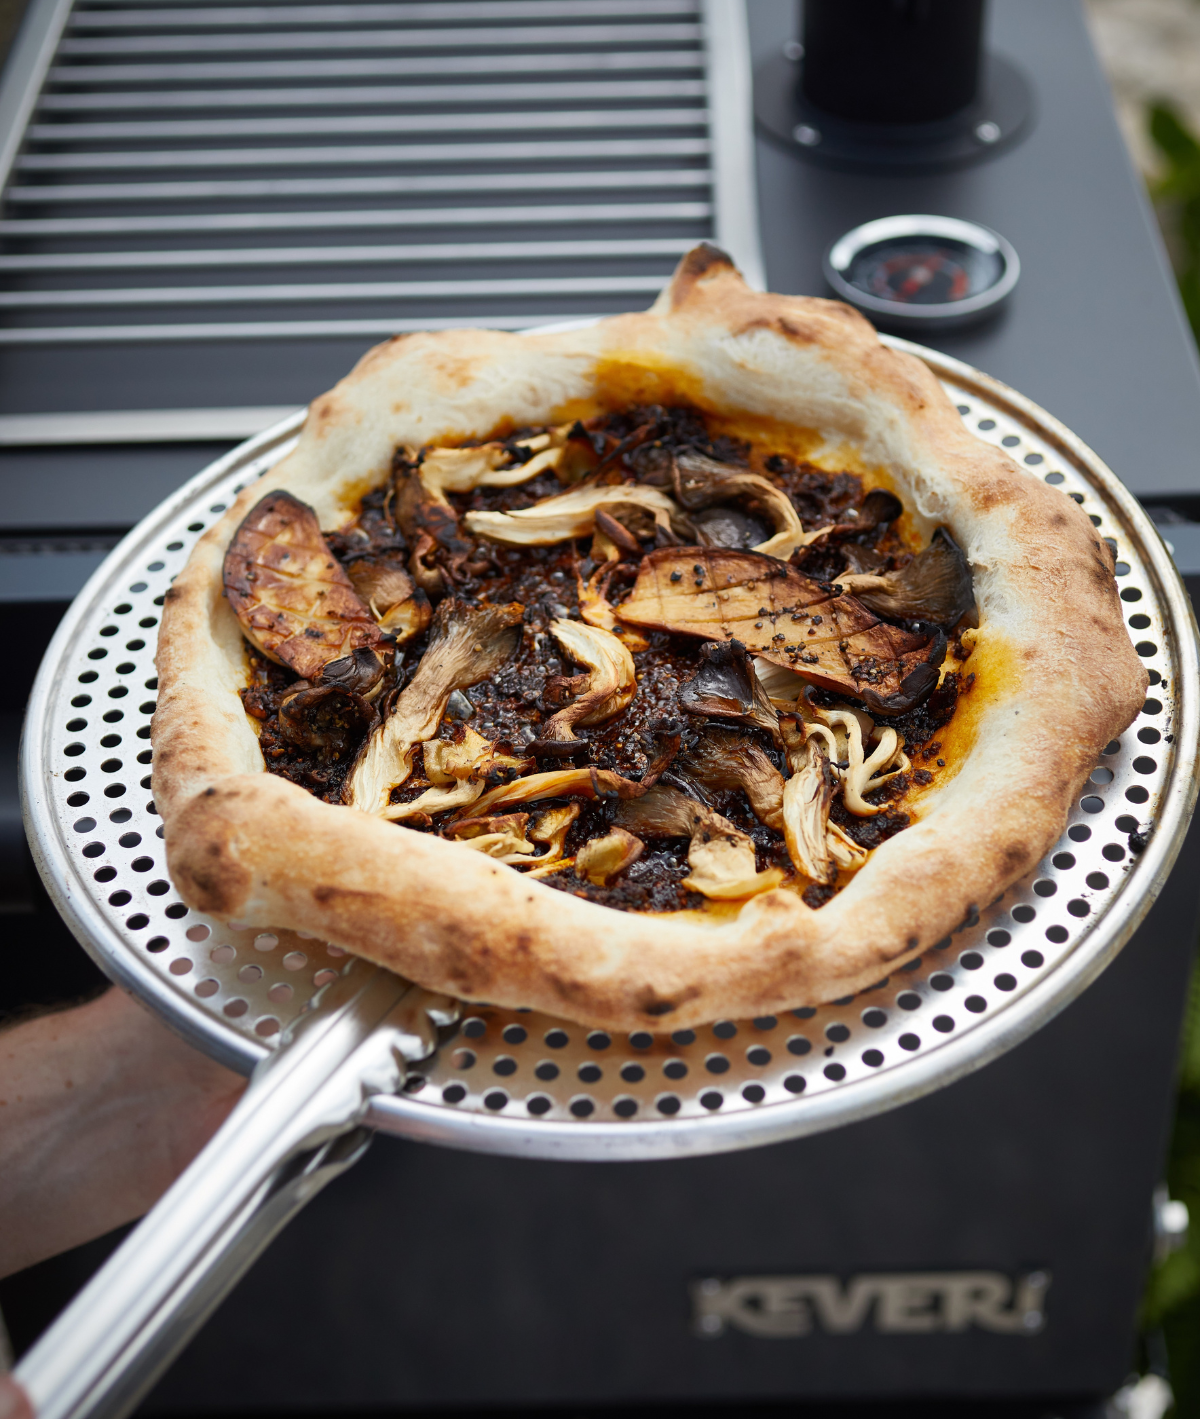
Famous for his smoke and spice flavors, our friend and James Beard Awarded Chef, Tim Byres transcended expectations with this pizza recipe recently, while cooking together on the Keveri H1 from Austin, TX. "A different pizza," Tim provoked, as we became intrigued watching him create this delicious take on a mushroom pizza. The outcome – delicious! So good, we asked him to share the recipe.
For those at home, we love that the mushrooms keep it as a great vegetarian option, and the flavors make it very beefy, which meat lovers will enjoy, too.
The recipe calls for macha. Macha is a Mexican staple, often referred to as "Macha Salsa." A flavor bomb of smokey, nutty, tangy, and spicey, your taste buds are going to love this. Incredible on the pizza, you'll want to save any leftover macha to drizzle over just about anything– eggs, guacamole, chicken, or grilled vegetables- you decide.
INGREDIENTS
Ingredients for the pizza:
Fresh Pizza DoughMushroom Mix
Parmesan Cheese
Salsa Macha
Olive oil
Salt
Pepper
Semolina
Salsa Macha:
-
2 tablespoons sesame seeds
1 ½ cups of neutral oil
¼ cup unsalted peanuts
10-15 garlic cloves
1 cup dried chiles de arbol
1 tablespoon kosher salt
1 tablespoon apple cider vinegar
SUPPLIES
- 5-6lb Lump Charcoal
- The Pizza Pan(s)
- High Heat Gloves (Need Gloves? Get ours here)
- The Keveri H1 Rooftop Rack
- Food processor (for Salsa Macha)
PREPARATION
Set Up
Start by lighting your Keveri H1 in Classic Mode. (Correct, not Pizza Mode, yet.) This will last just a few minutes, and allow for heat to rise while you get your pizza toppings and the Salsa Macha ready.
Salsa Macha Steps
Once you're in Classic Mode, place the large skillet from The Sizzling Pack in the lower rack and wait for 5 minutes to get it to the right temperature. Making Salsa Macha is easy and fast; just follow these steps and cook with the door open to see everything you are doing:
- Add the sesame seeds and toast them until they look slightly toasted (2-4 minutes). Remove them and transfer them into a food processor.
- Add the peanuts and toast them until they look slightly toasted (2-4 minutes). Remove them and place them inside the food processor.
- Add the oil, wait for 5 minutes to reach the right temperature, and then add the garlic cloves. Cook until the garlic is lightly browned (5-8 minutes). Remove the garlic cloves and put them into the food processor, leaving the oil in the pan.
- Add the chile de arbol to the pan and fry while moving them constantly until they change to a darker red color (2-3 minutes). Transfer the oil and chiles into the food processor.
- Add the salt and vinegar, and wait until the oil is at room temperature. Chop it with the food processor, but don't fully blend it.
Pizza Mode (750-840°F)
Now, open the bottom vent and chimney to position 4 and wait for the temperature to reach Pizza Mode. Once it's reached, adjust the bottom vent to position 2 and the chimney to position 3. This will stabilize the temperature, maintaining it at the correct level for an extended period.
Using the same skillet, and while wearing gloves for safety, combine the olive oil and mushrooms. Cook them for approximately 5 minutes or until they become caramelized, adding salt and pepper as desired. Set the caramelized mushrooms aside.
Heat Tip
Pay Attention. This Grill Mode reaches above average heat levels. Always wear gloves, and while pizza often pairs well with party - we encourage people to keep a 2-3 ft distance when socializing around the Keveri H1 for this recipe.
- Stretch the dough with your hands, using semolina or flour as needed, until it reaches the same size as the pizza pan.
- Lightly coat the pizza pan with olive oil to prevent sticking, and then place the stretched dough on top of it.
- Spread a thin layer of Macha sauce evenly over the dough.
- Add the caramelized mushrooms to the pizza.
- Place the pizza inside the Keveri H1 using the top rack position.
- Wait for 2-3 minutes, and the pizza will be ready.
Cook's Notes:
There is nothing wrong with the classic tomato cheese combo for pizzas, but try different salsas and cheese to create new flavors. That's the art of cooking with fire.
Share With Us
Post your pizzas using the Keveri H1 on social and tag us @Keveri.usa #KeveriFam
*Get easy instructions for traditional pizza dough HERE
_____________________________________
How to Light Up your Keveri H1 for Fast Grill Mode
More recipes
-
-
-
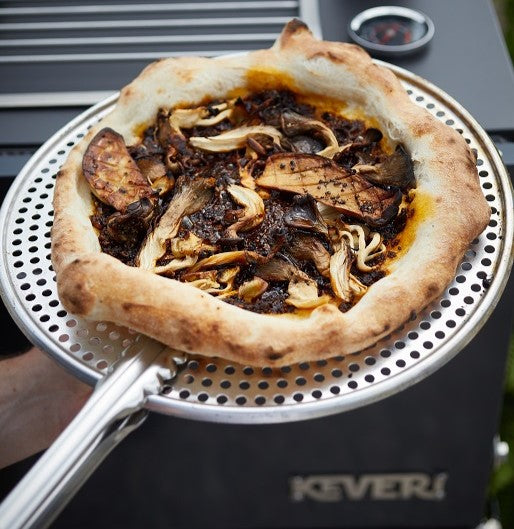
SHROOMIN' MACHA PIZZA
See Recipe >Chef Tim Byres shares a vegetarian pizza even meat lovers will enjoy.


- Choosing a selection results in a full page refresh.
- Opens in a new window.