________________________________________________
Active Fire Time: 2 hours and 15 minutes Total Time: 2 hours and 30 minutes
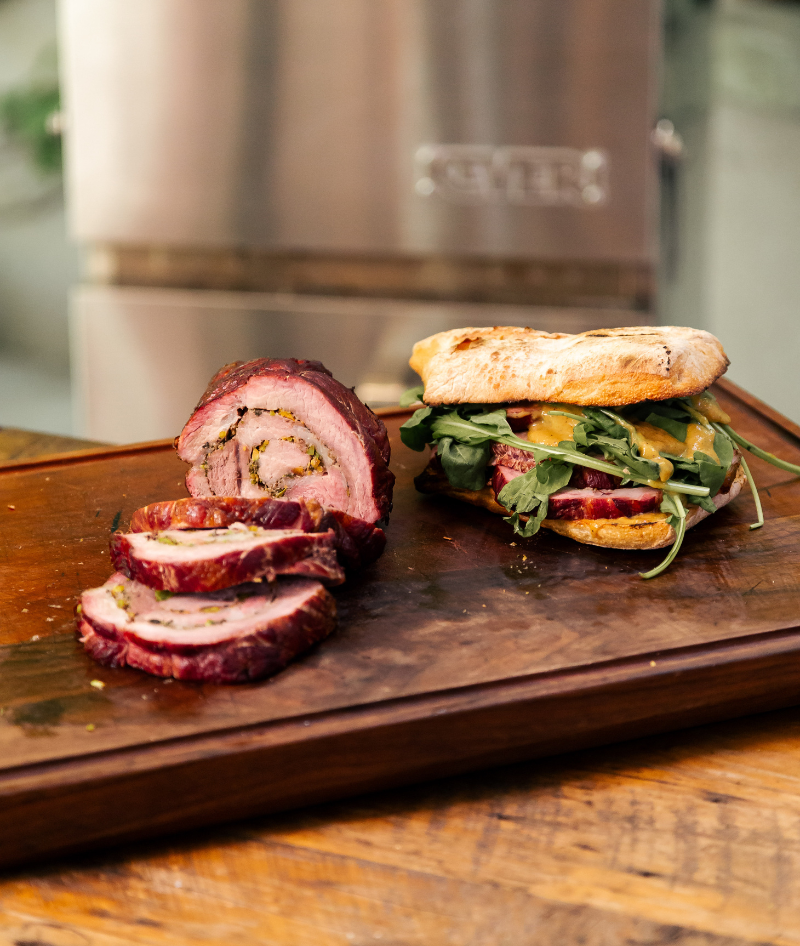
Porchetta is an Italian classic famous for its crispy crust and juicy, savory interior. This dish originates from the central region of Italy and consists of a rolled pork belly or loin stuffed with fresh herbs, garlic, and spices, slow roasted to perfection. Traditionally, porchetta requires several hours of cooking, but we will show you a shortcut that saves you time while maintaining its incredibly delicious flavor.
In this recipe, we will teach you how to prepare homemade porchetta in less time and how to make a peach sauce that perfectly complements the dish. Slices of the porchetta with this sauce create a wonderful sandwich packed with crunch, juiciness, and a little kick.
Bring a taste of Italy to your table and fire up the H1!
Ingredients
Serves 4+
Supplies:
2-3 lb briquets
High-Temperature Gloves
Twine (for tying up the porchetta)
Oven-safe pot
Blender/Immersion Blender
Preparation
Step 1:
Fire up the H1 in Low & Slow Mode at 248°F - 266°F according to the owner´s manual instructions or the Masterclass video.
Step 2:
Prepare the filling for our porchetta. Finely chop the fresh herbs and pistachios with a knife. Mix everything in a bowl.
Step 3:
Take the pork cut and begin to butterfly it, opening it up so it becomes a thin sheet, even cut about one finger thick. (For more details, see the recipe video.)
Step 4:
With the pork cut fully opened and laid flat on a table or large cutting board, season generously with freshly ground pepper and salt (we’ll only salt this side, so be generous). Then spread the filling evenly across the entire surface of the meat.
Step 5:
Carefully roll up the pork cut, making sure the filling stays inside. Begin tying the roll. Take a long piece of strong cotton twine. Slide it under the roll and tie a knot to create the first loop. Hold the twine with one hand and pass it underneath again to create a second loop. Once you have the spacing you want between each loop, pass the twine over and under the roll again. Continue this process until the entire roll is tied. (You can follow the detailed steps in the full recipe video.)
Step 6:
Once the pork roll is fully tied and secure, place it in the Keveri H1 on the top rack position. It’s important to position it away from direct heat—place it over unlit coals. Let it cook inside the H1 for about 2 hours or until the internal temperature of the pork reaches approximately 150°F.
Step 7:
While the pork cooks in the H1, start preparing the sauce. Dice the onion and garlic. In a pot that can go into the H1, add oil, salt, and pepper, then add the chopped garlic and onion. Place the pot on the middle rack of the H1, over direct heat.
Step 8:
Cut the peaches in half, remove the pits, and place them face down on the bottom rack position of the H1 over direct heat. Grill them for about 15 minutes or until golden and caramelized.
Step 9:
After 15 minutes, remove the peaches from the grill and add them to the pot. Add white wine and 2 tablespoons of brown sugar. Return the pot to the H1 on the lower rack over direct heat and let it cook for about 20 minutes.
Step 10:
Once the sauce has reduced slightly and the flavors are concentrated, remove it from the H1 and blend it using a blender or immersion blender. Set aside.
Step 11:
After about 2 hours in the H1, check the internal temperature of the porchetta. It should be around 150°F. If it is, remove it from the H1 and let it rest for a few minutes before carving.
Step 12:
While the porchetta is resting, heat the bread for the sandwiches. After resting, cut the cotton twine and slice the porchetta carefully to avoid it falling apart. Cut it into slices about one finger thick.
Step 13:
With all ingredients ready, assemble the sandwiches and enjoy!
Cook's Notes:
This recipe can also be done in Classic mode, which requires less time. You can sear it over direct heat for a few minutes and then finish cooking it over indirect heat.
Share With Us
Post what you cook using the Keveri H1 on social and tag us @Keveri. usa #KeveriFam
_____________________________________
Check the full recipe video here